Communication network
A downloadable tool for Windows and macOS
I would be happy if you would provide support so that I can continue working on the project
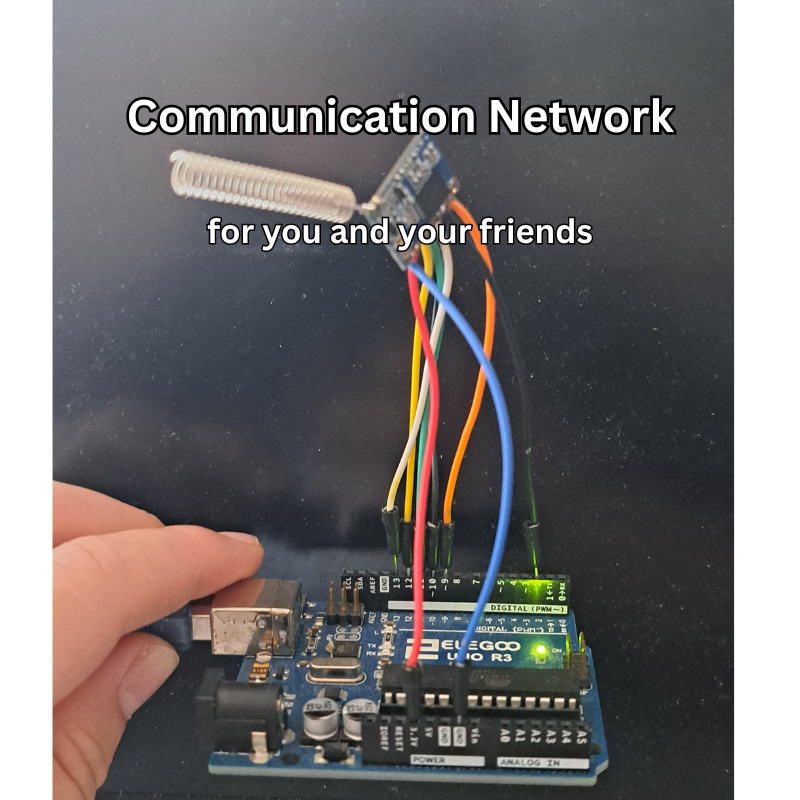
Connecting LoRa to Arduino
To connect the LoRa module to the Arduino, follow these instructions:
- LoRa Arduino
- VCC -> 3.3V
- GND -> GND
- MISO -> D12
- MOSI -> D11
- SCK -> D13
- NSS -> D10
- RST -> D9
- DIO0 -> D2
Please always end the const int localAddress = 0x03 in the code so that there are no problems. Please start at 10, i.e. number 0x10, 0x11 and so on
The setup works so that each participant needs their own module to communicate. You will need a laptop or another device with the Arduino IDE installed. Load the script onto your Arduino and use the serial monitor to communicate.
Your friend or the person you want to communicate with also needs a similar setup: an Arduino and a LoRa transmitter/receiver module. Once they have everything set up and are in the serial monitor, you can start sending messages. If additional people want to join the communication, they can build their own module and participate in the serial monitor chat.
The more people have active modules, the further the messages can travel. If a module receives a message but is not currently sending one, it will automatically forward the message to all nearby modules. This means each module also acts as a signal repeater. Therefore, the more modules there are, the farther the signal can reach. This setup is ideal for communication within a city, functioning like a WhatsApp group where everyone with a module can view and participate in the chat with others in their vicinity.
Please understand that this system is still in development. As a result, messages may not always be sent successfully, and there might be additional, out-of-context information included in messages. This project is open source, so anyone with improvements is welcome. We are stronger together. If you want, you can join my Discord or check out my updates on TikTok at Pasi.top for more support and information.
Download
Install instructions
Connecting LoRa to Arduino
To connect the LoRa module to the Arduino, follow these instructions:
- LoRa Arduino
- VCC -> 3.3V
- GND -> GND
- MISO -> D12
- MOSI -> D11
- SCK -> D13
- NSS -> D10
- RST -> D9
- DIO0 -> D2
The setup works so that each participant needs their own module to communicate. You will need a laptop or another device with the Arduino IDE installed. Load the script onto your Arduino and use the serial monitor to communicate.
Your friend or the person you want to communicate with also needs a similar setup: an Arduino and a LoRa transmitter/receiver module. Once they have everything set up and are in the serial monitor, you can start sending messages. If additional people want to join the communication, they can build their own module and participate in the serial monitor chat.
The more people have active modules, the further the messages can travel. If a module receives a message but is not currently sending one, it will automatically forward the message to all nearby modules. This means each module also acts as a signal repeater. Therefore, the more modules there are, the farther the signal can reach. This setup is ideal for communication within a city, functioning like a WhatsApp group where everyone with a module can view and participate in the chat with others in their vicinity.
Please understand that this system is still in development. As a result, messages may not always be sent successfully, and there might be additional, out-of-context information included in messages. This project is open source, so anyone with improvements is welcome. We are stronger together. If you want, you can join my Discord or check out my updates on TikTok at Pasi.top for more support and information.
Leave a comment
Log in with itch.io to leave a comment.